Labeling Session #1
In this first labeling session, multiple layers will be labeled in a single run of MAP LabelPro. The objectives for this session are to:
- Add labels for school as a first priority (source layer Public_Schools_point).
- Label the interstate roads with interstate shield symbols containing the interstate number (source layer Interstates_line).
- Label the highway roads with highway shield symbols containing the highway number (source layer Highways_line).
- Add street names (source layer Streets_line).
- Add names for land areas, written in the sea to make the map more readable (source layer Land_area).
- Make sure that the school and road names do not overlap with the post office and school symbols and park area, and do not cross highways and interstates line (obstacle layers: Post_Offices_point, Public_Schools_point, Parks_area, Interstates_line and Highways_line).
1. To start the MAP LabelPro Editor, click the MAP LabelPro button on the MAPublisher Toolbar.
The MAP LabelPro dialogue box opens.
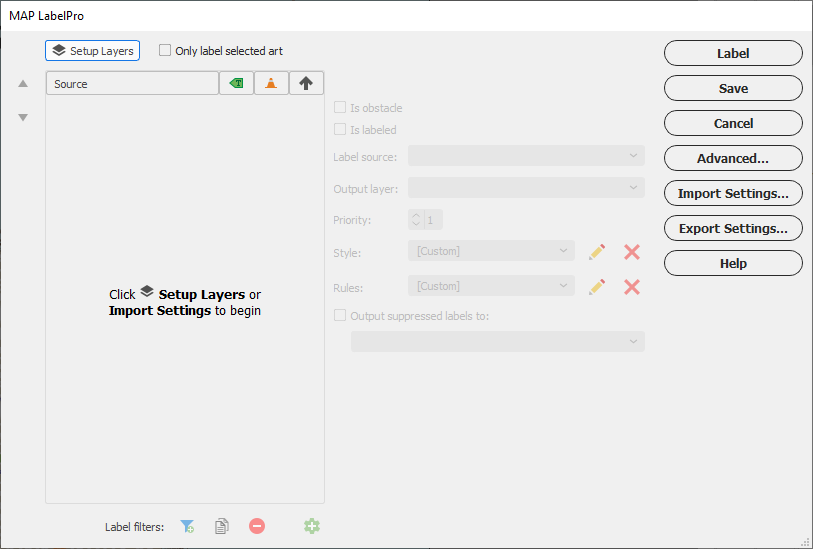
All layers have to be configured before labeling with MAP LabelPro. The general MAP LabelPro workflow: setup layers, specify attribute label source, set label output layer and suppression layers, set label priority, and define layer styles and rules.
 If the dialogue box needs to be closed before all settings are done, make sure to click the Save button.
2. In the MAP LabelPro editor dialogue box, click the Setup Layers button.
3. In the Setup Layers dialogue box, click the check box in the Show column for each of the following layers:
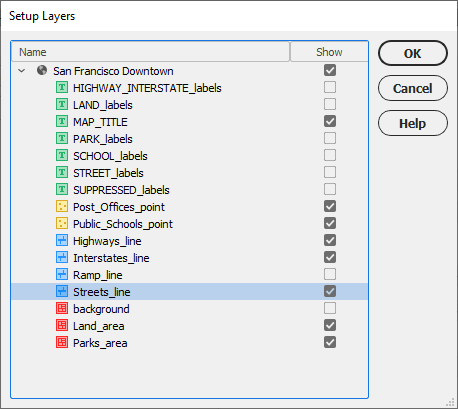
4. Make sure that the settings match the image above and click OK.
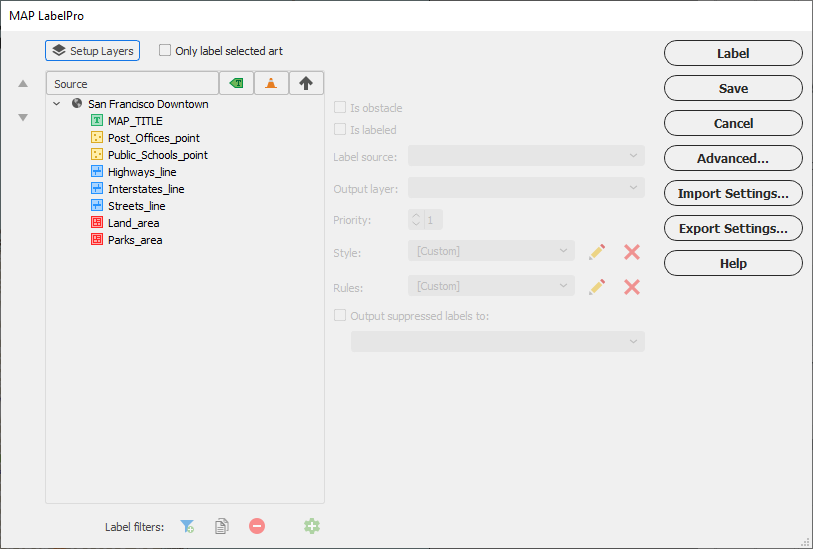
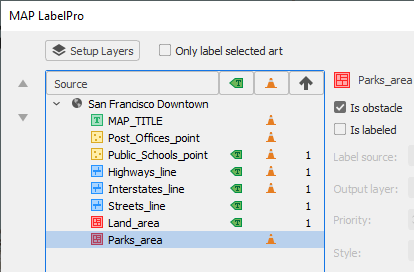
The MAP LabelPro dialogue box displays the MAP View and chosen layers. Layers can be designated for labeling and obstacles in the list by clicking the appropriate column.
5. The first layer in the Source list, MAP_TITLE, will be designated as an obstacle. Click the corresponding spot in the Obstacle column.
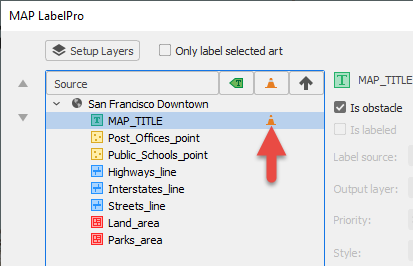
Notice that the Is obstacle check box is also checked, indicating that it is designated as an obstacle. An obstacle is an object that impedes the placement of a label.
6. Now designate the other layers as labeled or an obstacle by clicking the appropriate column:
Setup labeling extents
The configuration described in this exercise will limit the creation of labels to the extent of the selected source layers for labeling, with a margin of 0.2 inches on each side.
1. Click the Advanced button in the MAP LabelPro dialogue box.
2. Under Label Placement Area, choose the Extents of labeled layers option.
3. Click the Label Margins check box. Set the Top, Left, Right and Bottom drop-down lists to 0.20 in.
 If the Paths without stroke are not considered obstacles option is checked, areas that have no stroke will not be used as an obstacle in the labeling process, allowing generated labels to overlap with them.
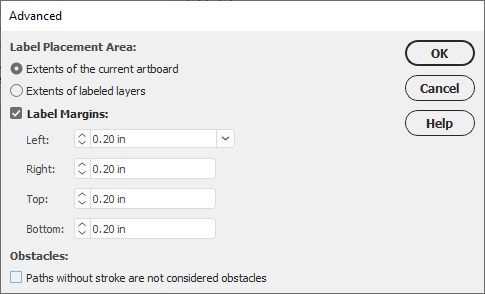
4. Click OK.
The label styles and rules of each source layer are now ready to be set.
5. Continue to Adjust Line Label Rules and Style.
Comments
0 comments
Please sign in to leave a comment.